Tags

Howto (51) Free Software (35) Powershell (33) Windows Server (23) AD (16) Hyper-V (16) Exchange (13) Office (13) Group Policy (10) Windows Server 2012 (9) Scripts (7) Symantec BE (5) Windows 8 (5) Cisco (4) TMG (4) Terminal Server (4) Cluster (3) HP (3) RDS (3) UAG (3) Citrix (2) DC (2) DNS (2) IE10 (2) OpenID (2) PKI (2) SCVMM (2) Windows Live (2) iLO (2) Backup (1) DPM (1) Fileserver (1) IE (1) SQL; DPM (1) Security (1) Sharepoint (1) Switch (1) VMWare (1) Veeam (1)
Posts tonen met het label Hyper-V. Alle posts tonen

maandag 28 oktober 2013

SCVMM 2012 Error 12711

Na het afbreken van een backup in DPM ging een VM onderuit, deze VM startte daarna niet meer op, zie onderstaande foutmelding:
 
Error (12711)
VMM cannot complete the WMI operation on the server (hv01.domain.local) because of an error: [MSCluster_Resource.Name="SCVMM Naam-VM"]
The requested operation can not be completed because a resource has locked status.
 
The requested operation can not be completed because a resource has locked status (0x1748)
 
Recommended Action
Resolve the issue and then try the operation again.


Oplossing:
 
 
Get-ClusterResource -Cluster clusternaam | where {$_.Name -like 'SCVMM *' -and $_.ResourceType -like '*Configuration'} | Update-ClusterVirtualMachineConfiguration
 
 
Daarna de VM een refresh gegeven in SCVMM en gestart.


maandag 15 april 2013

Unable to share ISO image file in SCVMM

Mocht je een foutmelding krijgen als je het vinkje zet bij “Share image file instead of copying it” dan moet je in de AD bij de Hyper-V host de delegation aanpassen:
 
 
Bij het mounten van de ISO
 
 
Onderstaand de
 
Op de Hyper-V host in de AD delegation instellen:
 
 
Mocht het dan nog niet werken, even controleren of “Authenticated Users” leesrechten hebben op de ISO library.
 

dinsdag 15 januari 2013

Virtual Machines Security Group toevoegen, foutmelding bij opstarten Hyper-V VM

Mocht je onderstaande foutmelding krijgen bij het opstarten van een VM dan kan dat aan twee dingen liggen:
 
 
De rechten op de vhd staan niet goed:
 
 
Dat kun je het beste verhelpen door de vhd van de VM te verwijderen en meteen weer toe te voegen.
 
 
De sid van de VM zal dan worden toegevoegd (komt uit xml – zie Symbolic link in ProgramData map)


Het kan echter ook zijn dat de Security Group “Virtual Machines” geen rechten heeft op de VM.
 
Je kunt de security group “Virtual Machines” niet via de GUI toevoegen:
 
 
Wil je deze groep rechten geven op een bepaalde directory, dan kan dat mbv Powershell:
 
 
PS C:\> $sid=Get-Acl 'D:\Virtual Disks'
PS C:\> $sid.SetSecurityDescriptorSddlForm(($sid.sddl + "(A;;FA;;;S-1-5-83-0) (A;OICIIO;0x101f01ff;;;S-1-5-83-0)"))
PS C:\> set-acl 'D:\Virtual Disks' -AclObject $sid
 
 
De Virtual Machines Group hoeft niet Full Control rechten te krijgen.
Standaard krijgen ze read/list rechten, zie:


maandag 9 januari 2012

Cluster Validation Fails on SCSI-3 Persistent Reservation


Bij het opzetten van een OTA omgeving op basis van Hyper-V kregen we een foutmelding tijdens de Cluster Validation.

De oplossing was om in de EVA Command View het besturingsysteem te wijzigen van de hosts die de vDisk gepresenteerd hebben.
Het besturingssysteem dient gewijzigd te worden in “custom” met waarde hex “00000004198009A8”

Met dank aan:


woensdag 16 november 2011

Exporteren / Importeren Hyper-V VMs


Microsoft heeft twee opties om een VM naar een nieuwe host te verplaatsen.

1.       De VM exporteren en op de nieuwe host importeren
2.       De VHD kopiëren naar de nieuwe host en daar een nieuwe VM aanmaken die gebruik maakt van deze VHD

Optie 2 is sneller echter moet je dan de netwerk settings opnieuw ingeven.
Tevens worden snapshots dan niet meegenomen.

Hieronder een uitleg hoe je een VM exporteert en vervolgens importeert.


Op deze locatie wordt een map aangemaakt met dezelfde naam als de VM vervolgens worden onderstaande mappen aangemaakt:


Kopieer deze map vervolgens naar de Hyper-V host waar deze VM op geïmporteerd moet worden.


De kans is groot dat na het importeren een foutmelding verschijnt:


Kijk je in de event log dan zie je waarschijnlijk dat de netwerkkaart niet geïnstalleerd kon worden.

De VM wordt geimporteerd naar de standaard locatie die opgegeven staan bij de Hyper-V settings:


dinsdag 1 november 2011

Hyper-V Tijd Synchronisatie in een Windows netwerk

Hyper-V Tijd Synchronisatie in een Windows netwerk

Tijdsynchronisatie is een kleine maar zeer belangrijke taak. Deze taak is wat gecompliseerder als deze moet plaatsvinden in een Windows omgeving die gedeeltelijk bestaat uit virtuele en fysieke servers.

Als eerste zal ik sumier uitleggen hoe tijdsynchronisatie in een Windows domein werkt.

Als je de eerste domein controller in een domein installeert zal deze eigenaar zijn van alle 5 de FSMO roles in een Active Directory. De PDC Emulator role is verantwoordelijk voor de tijd synchronisatie binnen het domein. Alle computers en servers die je aan het domein toevoegd gebruiken standaard de server die de PDC Emulator role bezit als tijdbron.

Op het moment dat je de Hyper-V role toevoegd aan een server die lid is van een domein wordt het echter intressant.

De fysieke Hyper-V host zal de PDC Emulator houder gebruiken als tijdbron, echter wanneer je Virtuele Machines aan de Hyper-V host toevoegd en de "Hyper-V Integration Services" geinstalleerd worden/zijn op deze Virtuele Machine zal de Virtuele Machine de tijd synchroniseren met de host en niet met de PDC Emulator houder.

Deze "VM naar Host" tijd synchronisatie is op zich geen probleem, zolang je Domain Controllers maar niet als VM op deze Host draaien. De hosts zullen namelijk de tijd synchroniseren met de PDC Emulator houder en zullen op hun beurt de tijd van de VMs up to date houden.
Maar wat gebeurt er als je PDC Emulator houder DC draait op een Hyper-V host die lid is van datzelfde domein?!? In dat geval zullen er problemen met de tijd optreden. De tijd van de virtuele DCs zullen uit de pas gaan lopen met de tijd van de host waarop deze draait. Deze host zullen op hun beurt weer uit de pas gaan lopen omdat ze hun tijd met de DC met de PDC Emulator Role synchroniseren.

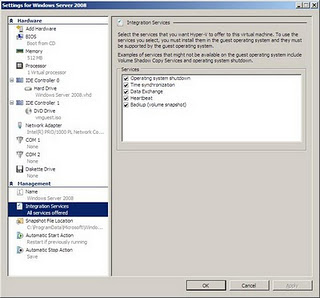
De oplossing zou misschien zijn om de "Time Synchronization" checkbox uit te vinken onder "Integration Components Offered" van de virtuele DC's. Deze oplossing lost bijna altijd de tijd problemen op, echter werkt deze oplossing niet altijd.

In een blog post van Ben Armstrong (Virtualization Program Manager bij Microsoft) staat echter dat je deze service niet moet uitzetten maar dat je beter de Windows Time Service (w32tm) kunt aanpassen op de virtuele DC om een juiste tijd synchronisatie in je domein te bewerkstelligen.

De betreffende link van de blog post van Ben Armstrong:

http://blogs.msdn.com/b/virtual_pc_guy/archive/2010/11/19/time-synchronization-in-hyper-v.aspx

In zijn post staat samengevat de volgende oplossing:

Schakel alle Hyper-V Integration Services in:


Controlleer de tijdbron van alle virtuele DC's:

w32tm /query /source

Als de virtuele DC de tijdbron: 'VM IC Time Synchronization Provider' gebruikt, dien je de volgende acties uit te voeren om ervoor te zorgen dat de Hyper-V tijd synchronisatie ingeschakeld blijft voor als de virtuele DC een reboot krijgt maar niet voor als deze up and running is:

reg add HKLM\SYSTEM\CurrentControlSet\Services\W32Time\TimeProviders\VMICTimeProvider /v Enabled /t reg_dword /d 0

(Kies 'Yes' als erom gevraagd wordt)

Configureer de server voor automatische domein tijd synchronisatie:
http://technet.microsoft.com/nl-nl/library/cc758905(WS.10).aspx

w32tm /config /syncfromflags:DOMHIER /update
net stop w32time & net start w32time

Query nu de Windows Time Synchronization Service, als het goed is laat deze zien dat de tijdbron de PDC Emulator houder is.

w32tm /resync /force

Nu zou de virtuele DC de tijd met zichzelf synchroniseren als deze draait, maar gebruik maken van de Hyper-V host als deze aan het herstarten is of als deze uit "Saved State" komt.

Nu moet je er alleen voor zorgen dat de virtuele DC en alle Hyper-V hosts met een externe tijdserver (NTP) kunnen synchroniseren. (bijvb: nl.pool.ntp.org over UDP port 123)

maandag 31 oktober 2011

Converteer VMDK naar VHD

Afgelopen week moest ik een aantal virtuele servers verplaatsen van een VMWare ESX host naar een Hyper-V host.

Je kunt natuurlijk Microsoft System Center Virtual Machine Manager (SCVMM) installeren om deze klus te klaren. Echter is dat wat omslachtig als je maar twee servers hoeft over te zetten.

Het alternatief is dat je WinImage download en hiervoor gebruikt. Dit is een fantastisch simpel programma, waarbij je tevens de mogelijkheid hebt om van fixed size over te zetten naar Dynamically Expanding.

Je kunt het programma 30 dagen gratis gebruiken (meer dan lang genoeg om deze servers over te zetten Knipogende emoticon), mocht je het willen aanschaffen dan kan dat voor maar een euro of 23.

http://www.winimage.com/winimage.htm

Screenshots:

image

image

donderdag 13 oktober 2011

Hyper-V making Template Virtual Machines

Voer onderstaande stappen uit om een Windows Server 2008 (R2) of Windows 7 Virtual Machine Template aan te maken:
  1. Installeer een nieuwe VM op basis van een van genoemde OS-en
  2. Voer alle patches en updates uit zodat je template up-to-date is
  3. Installeer eventueel programma's die je in je Template wilt meenemen
  4. Defragmenteer nu je schijven (mijn c-schijf was voor 14% gefragmenteerd na installatie van alleen het OS en de Windows updates)
  5. Sluit de VM af en kopieer deze
    • Doe dit voor je gaat syspreppen zodat je later de Template nog kunt bijwerken
  6. Start de VM weer op en voer een OOBE uit met Sysprep
    • C:\WINDOWS\SYSTEM32\SYSPREP\SYSPREP.EXE
    • Generalize vinkje zetten zodat er een nieuwe SSID wordt aangemaakt
    • Kies voor de Shutdown optie
  7. Kopieer de Template voor alle nieuwe VM's die je wilt uitrollen
    • Advies is om de gesysprepte template Read-Only te maken zodat deze beveiligd is tegen opstarten en waardoor deze onbruikbaar wordt
Maak nieuwe VMs aan op basis van de Template:
  1. Creëer een nieuwe VM dmv de wizard
  2. Kies nu alleen voor de optie "Use an existing virtual hard disk" en selecteer de vhd die je eerder (puntje 6) gekopieerd en hernoemd hebt.

Bron:
http://sondreb.com/blog/post/hyper-v-making-template-virtual-machines.aspx

Antivirus and Hyper-V (or: Why can’t I start my virtual machine?)

A little while ago our support team put together this KB article in response to a problem that a lot of people have been reporting. Basically, what is happening is that users are having problems starting virtual machines after they install antivirus software in the management operating system.
The root cause of the problem is that a number of these programs monitor file access in a way that interferes with Hyper-V’s attempts to open virtual machine files. If you see this problem – you have two options:
  1. Don’t install antivirus. Now – before you choke on your coffee or get your pitch-forks - listen to me for a moment. If you are running a server core configuration, or a full server configuration, and you have nothing running in the management operating system other than Hyper-V, and you do not have people logging in and browsing the web in the management partition, etc… Then you do not really need to have antivirus software installed as there is limited risk of a virus.
  2. Install antivirus and set up the following exclusions (most antivirus programs allow you to exclude specific directories, files and processes from scanning to help deal with issues such as these):
    • Default virtual machine configuration directory (Normally this is C:\ProgramData\Microsoft\Windows\Hyper-V)
    • Custom virtual machine configuration directories
    • Default virtual hard disk directory (Normally this is C:\Users\Public\Documents\Hyper-V\Virtual Hard Disks)
    • Custom virtual hard disk directories
    • Snapshot directories
    • Vmms.exe
    • Vmwp.exe
Then everything should be just fine.
 
Bron:

Install Windows 2003 Small Business Server on Hyper-V

I tried to install Windows 2003 Small Business Server on Hyper-V and I got into a visious circle.

I can't complete the installation because there is no network adapter available. To install the network adapter I need to install the Integration Services and thus SP2, but to install SP2 I need a network adapter!?!

Solved it (march 26,2010):
Installed a virtual nic (dummy nic): http://www.ntkernel.com/w&p.php?id=32
Downloaded the driver and put it in an ISO file (together with SP1 and SP2) so I could mount it to the Windows 2003 Small Business Server and install it.

maandag 3 oktober 2011

Domain Controller en Hyper-V

The Domain Controller Dilemma

Often I have people ask me about the Domain Controller dilemma. The basic problem is this: if you decide to virtualize all of your servers, how do you handle the domain controllers which control the domain used by your Hyper-V servers? There are a couple of options that you can consider here:
  1. Keep the root domain controller on physical hardware
    By keeping the root domain controller on separate physical hardware you can avoid any potential for problems. However you also miss out on the benefits of virtualization for your domain controller (better hardware utilization, hardware mobility, easier backup, etc…).
  2. Keep the Hyper-V servers out of the domainIn small deployments you can consider just leaving the Hyper-V servers as part of a workgroup and then running all domain controllers inside virtual machines. This approach has two problems. First, you lose the security advantages of running in a domain environment and second, it is hard to have multiple administrators in such an environment (as local user accounts need to be created on each Hyper-V server). Also, you cannot use all the functionality of SCVMM in such an environment.
  3. Establish a separate (physical) domain for Hyper-V serversThis approach is a compromise between the first two approaches. Here you virtualize your primary domain controller environment, but setup a secondary (smaller) domain environment for your Hyper-V servers using a physical server. The advantage to this approach is that you get all the benefits of having your Hyper-V servers in a domain – but your primary domain environment benefits from being virtualized. The problem with this approach is that you still have an underutilized server sitting around in your server room / data center.
  4. Run the domain controller on top of Hyper-V anywayThe last option is to just stick the domain controllers in virtual machines and then join the parent Hyper-V environment to the domain in question. Now, while this sounds like a problematic environment it can be done with some careful planning. Here are the following steps to take / things to consider:
    1. You should configure the domain controller virtual machines to always start when the parent starts – whether they were running before or not (this is configurable in the virtual machine settings).
    2. If you have other virtual machines configured to start automatically you may want to configure them to have a delayed start time (say by a minute or two) to allow the domain controllers to start up quickly.
    3. You should configure the domain controller virtual machines to shutdown (and not save state) if the physical computer is shutdown.
    4. You should ensure that you have a way of managing the Hyper-V environment if the domain controller fails to start. This means keeping note of the local administrator account / password and testing that you can use it (either locally or remotely) to access the Hyper-V management console.
So there you have it. I actually use option 4 for the (albeit small) domain environment that I run in my house and have had no issues. A couple of extra points to make here:
  • Points 1-3 of option 4 should apply to *any* time that you virtualize a domain controller – even if it is not being used by the parent partition in question.
  • You should never use saved state / snapshots with domain controllers – as this can be catastrophic.

Mount VHD file onto your filesystem

To mount a VHD file onto your file system, you either ran some very complicated VB (or PowerShell) Script or you used VHDMount.exe that came with Virtual Server. If you’re running Windows 7 (or Windows Server 2008 R2), you can now use Diskpart.

So, from an elevated command prompt, run Diskpart.

Select the VHD in question:

sel vdisk file=”c:\users\daven\desktop\xp professional.vhd”

Then attach it to your system:

attach vdisk

=============================================
Vanuit Hyper-V Manager kun je ook een VHD aan een andere VM koppelen, waardoor je bij de bestanden kunt komen.
==============================================

Extra info: http://blogs.msdn.com/b/7/archive/2009/10/08/diskpart-exe-and-managing-virtual-hard-disks-vhds-in-windows-7.aspx

Windows Server Performance Team: Increase VMBus buffer sizes to increase network throughput to guest VMs

The Windows Server Performance team have done a really interesting post on how to optimize network performance inside of virtual machines by increasing the size of the VMBus buffers used by our network adapters. They also do a very good job of explaining the causes and implications of performance issues around virtual networking – so go check it out:

http://blogs.technet.com/winserverperformance/archive/2010/02/02/increase-vmbus-buffer-sizes-to-increase-network-throughput-to-guest-vms.aspx

NIC Teaming met Hyper-V

Wil je in Hyper-V gebruik maken van NIC Teaming dan moet zal er gebruik moeten gemaakt worden van de teaming software van HP (of andere OEMs).

(Microsoft is leaving NIC teaming to the OEM’s such as HP, Broadcom, Dell and IBM.This means that getting virtual network redundancy will rely on a Hyper-V friendly version of the HP Network Configuration Utility.)

BELANGRIJK:
Order of installation
To use HP ProLiant Network Teaming Software with Windows Server 2008 with Hyper-V, the software must be installed and enabled in the following order:
1. Install and enable the latest version of Hyper-V from Microsoft.
2. Install and enable the HP ProLiant Network Teaming Software.

NOTE
If the teaming software is installed first, the network adapters may cease passing traffic. The resolution to this issue is to uninstall both the HP teaming software and Hyper-V, reboot the server and then reinstall Hyper-V and the teaming software.

Bron: http://h20000.www2.hp.com/bc/docs/support/SupportManual/c01663264/c01663264.pdf

Installatie Hyper-V op HP ML350G5

Hieronder de stappen:
  • Download de laatste firmware CD van de HP site en gebruik deze om de hardware in de server van de laatste firmware versie te voorzien.
  • Installeer Windows Server 2008 R2 (Standard)
  • Wijzig eventueel de Computernaam en IP-adressen
  • Installeer Powershell
  • Werk Windows bij met de laatste updates
  • Voor het uitvoeren van de setup van de Proliant Support Package (PSP) dient de SNMP service geinstalleerd te worden (serverManagerCMD -i snmp-services), anders kan de HP Insight Management Agent niet geinstalleerd worden.
  • Installeer de laatste HP Proliant Support Package voor Windows Server 2008 R2 via HP Drivers ML350G5 maar installeer geen NIC Teaming Software (zie http://salfischberger.blogspot.com/2011/10/nic-teaming-met-hyper-v.html)
  • Tijdens de installatie van PSP kan de HP Insight Management Agent geconfigureerd worden: Voeg iig de Administrators groep toe aan de Administrators en bij User Acces kies je voor Local Access – Administrator (grant full…..) en bij Trust Mode – Trust All. Vervolgens zet je de SNMP datacollection interval op 10 minuten en enable je de service.
  • De “HP Network Configuration Utility” mag je nog niet installeren (deselect). Installeer deze pas nadat je Hyper-V hebt geinstalleerd. http://h20000.www2.hp.com/bc/docs/support/SupportManual/c01663264/c01663264.pdf.
  • Bij de eigenschappen van de SNMP service voeg je op het tabblad security nog Community Rights “READ ONLY” aan de Community Groep “{mysecPublic148}” en “READ WRITE” aan de Community groep “{mysecPrivate149}” toe. Dit om bij de HP System Management Homepage wat meer informatie te kunnen zien.
  • PSP installeer je alleen op de host server niet op de guest servers
  • Via de RBSU (BIOS) zet je de “No-Execute Memory Protection” en de “Intel(R) Virtualization Technology” op enabled.
  • Nu activeer je de role “Hyper-V”

Backing up Virtual Machines using Windows Server Backup in Server 2008 R2

Hieronder een blogpost van hoe je VMs in Windows 2008R2 kunt backuppen mbv Windows Server Backup.

Even een puntje van aandacht: Indien je VMs hiermee wilt backuppen dan kan dat alleen maar door het hele volume te backuppen. Je kunt niet alleen de vhd file backuppen.

Ook als je een VM wilt restoren, kan dat alleen maar door het hele volume te restoren.
Persoonlijk nog niet getest maar dat ga ik zeker doen.

http://mindre.net/post/Backing-up-Virtual-Machines-using-Windows-Server-Backup-in-Server-2008-R2.aspx

of:

http://www.virtualizationadmin.com/articles-tutorials/microsoft-hyper-v-articles/backup-recovery/installing-configuring-windows-server-backup-hyper-v.html

of bekijk onderstaande video:

http://technet.microsoft.com/en-us/windowsserver/dd775213.aspx

RECOVERY:
Om een individuele VM te restoren moet je de volgende commando’s uitvoeren:

In CMD:
Voer het commando: “wbadmin get versions” uit om te kijken welke backups aanwezig zijn.
Voer vervolgens het commando: “wbadmin get items -version:10/09/2010-10:08″ uit om de items in de backup te bekijken.
Onder het kopje “Application = Hyper-V” zie je GUIDs van de verschillende VMs.
Om te zien welke GUID bij welke VM hoort moet je onderstaand Powershell commando uitvoeren:
get-wmiobject -namespace “root\virtualization” -query “select * from msvm_computersystem” | format-table -property name, elementname

Als je onderstaand Powershell script in een ps1 opslaat en scheduled dan krijg je voortaan ook meldingen per email ofdat je backup gelukt is of niet.

===============================
$maxHours = 24
$email = “your@mail.net”
$smtpServer = “stmp.mail.net”
$sendSuccess = $true
## Script ————————————————————
Add-Pssnapin Windows.serverbackup
$summary = Get-WBSummary
$timeBetween = [DateTime]::Now – $summary.LastSuccessfulBackupTime
$computerName = get-content env:computername
if ($summary -eq $null)
{
$smtp = new-object Net.Mail.SmtpClient($smtpServer)
$smtp.Send($email, $email, “BackupCheck.ps1 failed on $computerName”, “BackupCheck.ps1 failed with unknown error.”)
}
elseif ($timeBetween.TotalHours -gt $maxHours)
{
$smtp = new-object Net.Mail.SmtpClient($smtpServer)
$smtp.Send($email, $email, “Windows Server Backup on $computerName failed”, “Last successfull backup on $computerName was at ” + $summary.LastSuccessfulBackupTime)
}
elseif ($sendSuccess)
{
$smtp = new-object Net.Mail.SmtpClient($smtpServer)
$smtp.Send($email, $email, “Windows Server Backup on $computerName was successfull”, “Last backup on $computerName was successfull at ” + $summary.LastSuccessfulBackupTime)
}
==============================

Mbv de Windows Recovery Environment zou het mogelijk moeten zijn om de gehele server inclusief de VM terug te zetten.

http://technet.microsoft.com/en-us/library/cc766048(WS.10).aspx